
Welcome! This manual guides you through your GE Profile dishwasher’s features, ensuring optimal performance and longevity. Explore smart connectivity and advanced wash technology.
Understanding the Manual’s Purpose
This manual serves as your comprehensive guide to operating and maintaining your GE Profile dishwasher. It details everything from initial setup and proper loading techniques to understanding various wash cycles and control panel functions. Carefully reviewing this document will maximize your appliance’s efficiency and lifespan, preventing potential issues.
Furthermore, it outlines crucial safety information, troubleshooting steps for common problems, and details regarding warranty coverage. Familiarizing yourself with these sections ensures safe operation and allows you to quickly address any concerns that may arise. Consider it your primary resource for a seamless dishwasher experience.
Dishwasher Model Numbers and Identification
Locating your dishwasher’s model number is crucial for accessing specific support and ordering replacement parts. This unique identifier is typically found on a label inside the dishwasher door, often along the frame or on the inner side of the top rack. Record this number for future reference, as it’s required when contacting customer service or downloading specialized documentation.
The model number provides detailed information about your dishwasher’s features and specifications. Understanding its components helps ensure you’re using the correct procedures for maintenance and repair. Refer to this number whenever seeking assistance related to your GE Profile dishwasher.

Safety Information
Prioritize safety! Follow all instructions carefully to prevent risks of fire, electric shock, or injury during installation and operation of your dishwasher.
Important Safety Instructions
Read all instructions before use. To reduce the risk of fire, electric shock, or injury, always follow basic safety precautions. Never operate the dishwasher if the power cord or plug is damaged. Do not use an extension cord. Ensure proper grounding to prevent electrical hazards.
Supervise children closely when they are near the dishwasher. Do not allow them to play with the controls. Avoid storing flammable materials near the appliance. Disconnect power before servicing. Improper installation or use can void the warranty and create unsafe conditions. Always adhere to local electrical codes.
Grounding Requirements
Essential for safety! This dishwasher must be properly grounded. Grounding provides a path for electrical current to flow in the event of a short circuit, reducing the risk of electric shock. Never connect the grounding wire to a gas pipe. Ensure the power outlet is properly grounded by a qualified electrician.
Do not modify the power cord plug. If a grounding adapter is used, it must be properly connected and secured. Improper grounding can result in a dangerous electrical hazard. Regularly inspect the grounding connection for integrity and proper function.

Getting Started
Initial setup is key! Properly install and connect your GE Profile dishwasher, then learn the best methods for loading dishes for optimal cleaning results.
Initial Setup and Installation
Carefully unpack your new GE Profile dishwasher, inspecting for any shipping damage. Ensure you have all necessary connections – water supply, drain line, and electrical outlet – readily available. Refer to the detailed installation instructions included with your model for proper plumbing and electrical hookups.
Leveling the dishwasher is crucial for optimal performance; adjust the feet as needed. Securely attach the dishwasher to the cabinetry to prevent movement during operation. Finally, run a short rinse cycle to flush the system before your first full wash, ensuring everything is primed and ready to go!
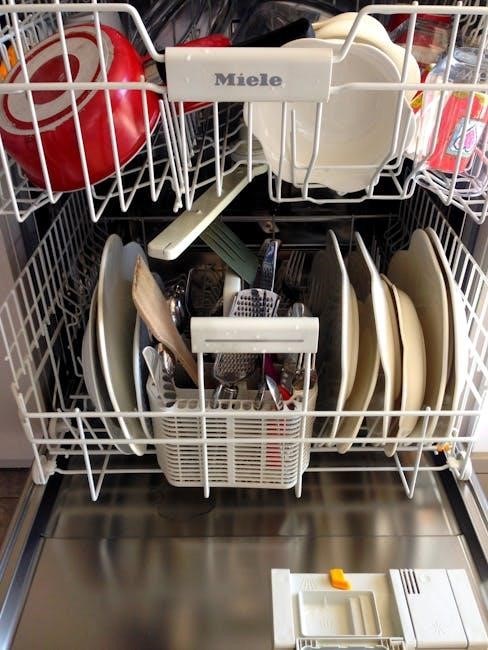
Loading the Dishwasher Correctly
Maximize cleaning by loading strategically! Place heavily soiled items on the bottom rack, facing the spray arms. Ensure items don’t block the detergent dispenser or spray arm rotation. The upper rack is ideal for glasses, cups, and smaller items.
Avoid overcrowding; proper spacing allows water to reach all surfaces. Load utensils with handles down in the basket to prevent nesting. Check for food particles before loading, scraping off large debris. Correct loading ensures sparkling clean dishes every time!

Wash Cycles and Options
Explore versatile cycles! Choose from Normal, Heavy Duty, Delicate, Quick Wash, and Rinse Only for customized cleaning tailored to your dishwashing needs.
Normal Wash Cycle
The Normal Wash cycle is designed for everyday dish loads with a moderate amount of food soil. This cycle delivers a balance of cleaning power and energy efficiency, making it ideal for routinely washing dishes. It utilizes a combination of water temperatures and spray intensities to effectively remove food residue while conserving water and electricity.
For optimal results, ensure dishes are properly loaded, and the detergent dispenser is filled with the appropriate amount of dishwasher detergent. This cycle is a reliable choice for most dishwashing tasks, providing consistently clean and sparkling results without excessive water usage;
Heavy Duty Wash Cycle
The Heavy Duty Wash cycle is specifically engineered for tackling heavily soiled dishes, pots, and pans. This cycle employs higher water temperatures, increased wash pressure, and an extended wash time to effectively remove stubborn food residue like baked-on grease and dried-on food particles.
It’s perfect for casserole dishes, baking sheets, and items that require a more intensive cleaning process. For best results, pre-scrape large food particles and ensure the spray arms are unobstructed. This cycle prioritizes cleaning power over energy conservation, delivering exceptionally clean results for challenging loads.
Delicate/China Wash Cycle
The Delicate/China Wash cycle is designed for your most fragile dishware, including fine china, crystal, and delicate glassware. This cycle utilizes a lower water temperature and reduced water pressure to prevent chipping, cracking, or damage to these sensitive items.
It features a gentler wash action and a shorter drying time to minimize the risk of thermal shock. It’s recommended to use a mild detergent and avoid overloading the dishwasher when using this cycle. Proper loading, with items securely placed, is crucial for optimal results and protection.
Quick Wash Cycle
The Quick Wash cycle is perfect when you need clean dishes in a hurry! This cycle delivers a satisfactory clean for lightly soiled loads in significantly less time than a normal wash. It utilizes increased water pressure and a modified wash pattern to expedite the cleaning process.
While efficient, it’s best suited for smaller loads and dishes without baked-on food residue. Using a quality detergent is still recommended for optimal results. This cycle prioritizes speed, offering convenience without compromising cleanliness for everyday use.
Rinse Only Option
The Rinse Only option is incredibly useful for temporarily cleaning dishes that aren’t immediately being washed. This cycle performs a cold-water rinse, removing food particles and preventing odors from building up. It’s ideal for pre-washing heavily soiled items or holding dishes until a full load accumulates.
Remember, this cycle doesn’t include detergent, so it won’t fully sanitize your dishes. It simply prepares them for a complete wash cycle later. Utilizing this feature minimizes food drying and makes subsequent cleaning easier.

Control Panel Overview
Explore intuitive controls! The panel features clear display indicators, cycle selection buttons, and options for customized washing, enhancing your dishwasher experience;
Display Indicators and Symbols
Understanding the display is key! Your GE Profile dishwasher’s control panel utilizes various indicators and symbols to communicate its status. A “Cycle Status” indicator illuminates during operation, progressing through stages like washing, rinsing, and drying.
Symbols denote selected options – “Heated Dry” shows when this feature is active, while “Delay Start” displays the remaining time. Error codes, if present, signal potential issues requiring attention; consult the troubleshooting section for details.
Low rinse aid and detergent levels are also indicated, prompting timely refills. Familiarizing yourself with these visual cues ensures efficient and informed dishwasher use.
Cycle Selection Buttons
Effortless cycle selection! The control panel features dedicated buttons for each wash cycle: Normal, Heavy Duty, Delicate, Quick Wash, and Rinse Only. Simply press the desired button to initiate the corresponding program.
Option buttons allow customization – “Heated Dry,” “Delay Start,” and potentially “Sanitize” or “Power Wash” modify the selected cycle;
Illuminated buttons confirm your selections. Remember to close the door securely after choosing a cycle to begin operation. Explore each cycle to find the perfect wash for your dishware needs!

Care and Maintenance
Maintain peak performance! Regularly clean the filter, spray arms, and interior to prevent buildup and ensure consistently sparkling clean dishes.
Cleaning the Filter System
Maintaining a clean filter is crucial for optimal dishwasher performance. Food particles and debris can accumulate, reducing cleaning effectiveness and potentially causing clogs. Locate the filter, typically at the bottom of the dishwasher interior. Carefully remove it, often involving a quarter-turn to unlock. Rinse the filter thoroughly under running water, using a soft brush to remove stubborn residue.
Inspect the filter for any damage and replace if necessary. Reinstall the clean filter, ensuring it’s securely locked into place. Regular filter cleaning – ideally monthly, or more frequently with heavy use – will contribute to consistently clean dishes and extend the life of your GE Profile dishwasher.
Cleaning the Spray Arms
Ensure powerful cleaning action by regularly inspecting and cleaning the spray arms. Food particles can clog the spray arm nozzles, diminishing water pressure and cleaning performance. Carefully remove the spray arms – typically they unscrew or snap off; Use a toothpick or small wire to clear any debris from the nozzles.
Rinse the spray arms thoroughly under running water. Check for any cracks or damage and replace if needed. Reattach the spray arms securely, ensuring they rotate freely. Clean spray arms contribute to spotless dishes and efficient operation of your GE Profile dishwasher.
Dishwasher Interior Cleaning
Maintain a fresh and hygienic dishwasher by cleaning the interior regularly. After extended use, residue and odors can build up. Run an empty cycle with a dishwasher cleaner, or use a cup of white vinegar placed in the top rack. This helps dissolve grease and eliminate smells.
Wipe down the door, gaskets, and interior walls with a damp cloth. Pay attention to the detergent dispenser and silverware basket. A clean interior ensures optimal performance and prevents transfer of odors to your dishes within your GE Profile dishwasher.
Troubleshooting Common Issues
Resolve typical problems like starting failures, poor cleaning, or leaks with this guide. Find solutions to keep your GE Profile dishwasher running smoothly.
Dishwasher Not Starting
If your GE Profile dishwasher fails to start, first verify the power supply. Ensure the dishwasher is properly plugged into a functioning outlet and that the circuit breaker hasn’t tripped. Check the door latch; it must be securely closed for operation.
Also, examine the control panel for any locked or disabled functions – sometimes a prolonged press of a button can activate a child lock. If these checks don’t resolve the issue, consult the full manual for reset procedures or contact GE’s customer support for assistance. A faulty thermal fuse could also be the culprit.
Poor Cleaning Performance
Experiencing unsatisfactory cleaning results? Begin by confirming proper loading techniques – avoid overcrowding and ensure spray arms aren’t obstructed. Verify sufficient detergent is used, selecting the appropriate cycle for the load’s soil level. A clogged filter significantly impacts performance; regularly clean it according to the manual’s instructions.
Inspect the spray arms for blockages and ensure they rotate freely. Hard water can also contribute to poor cleaning; consider using a rinse aid or dishwasher cleaner. If issues persist, a professional service check might be necessary.
Water Leaks
Discovering water leaks requires immediate attention! First, inspect the door gasket for damage or debris, ensuring a tight seal. Check the water inlet hose and drain hose connections for looseness or cracks – tighten or replace as needed. Verify the dishwasher is level; an uneven unit can cause leaks.
Overfilling can also lead to leaks; consult the manual regarding water inlet valve function. If the leak persists after these checks, discontinue use and contact a qualified service technician for professional assistance.

GE Profile Dishwasher Features
Explore innovative features! Enjoy smart connectivity via Cync integration and experience superior cleaning with advanced wash technology for exceptional results.
Smart Connectivity (Cync Integration)
Seamless Control at Your Fingertips: Your GE Profile dishwasher integrates effortlessly with the Cync system, offering unparalleled convenience and control. Manage cycles, monitor progress, and receive notifications directly through the Google Home app or with simple voice commands.
This integration allows for remote operation – start or pause a wash cycle from anywhere! Adjust settings and brightness remotely, enhancing your daily routine. Experience a truly connected kitchen with the power of Cync, transforming how you interact with your appliances.
Advanced Wash Technology
Revolutionizing Clean: GE Profile dishwashers boast cutting-edge wash technology designed for exceptional cleaning performance. Innovative spray arm designs and targeted water jets ensure comprehensive coverage, reaching every corner of your dishwasher.
Experience superior results with features engineered to tackle tough food soils and delicate items alike. This technology optimizes water usage and energy efficiency, delivering sparkling clean dishes while minimizing environmental impact. Enjoy consistently spotless results with every cycle, thanks to GE’s commitment to innovation.

Warranty Information
Protect Your Investment: This section details the coverage for your GE Profile dishwasher, outlining claim procedures and ensuring peace of mind for years to come.
Coverage Details
Comprehensive Protection: Your GE Profile dishwasher is covered against defects in materials and workmanship for one year from the date of original purchase. This includes parts and labor for any repairs performed by an authorized GE service technician.
Extended Warranties: Optional extended warranties are available for purchase, providing additional coverage for parts and labor beyond the initial one-year period. These extended plans can offer up to five years of worry-free protection.
What’s Not Covered: Damage caused by misuse, improper installation, or acts of nature is not covered under the standard warranty. Regularly scheduled maintenance, such as filter cleaning, is also the owner’s responsibility.
How to Make a Claim
Initiating a Claim: To file a warranty claim, contact GE Appliances’ service center at 1-800-GE-CARES (1-800-432-2737). Have your model number, serial number, and proof of purchase readily available. A representative will guide you through the claim process.
Required Documentation: You’ll need to provide a copy of your original purchase receipt or other proof of purchase. The service technician may request additional information or photos to assess the issue.
Authorized Service: All repairs must be performed by an authorized GE service technician to be eligible for warranty coverage. Unauthorized repairs may void your warranty.