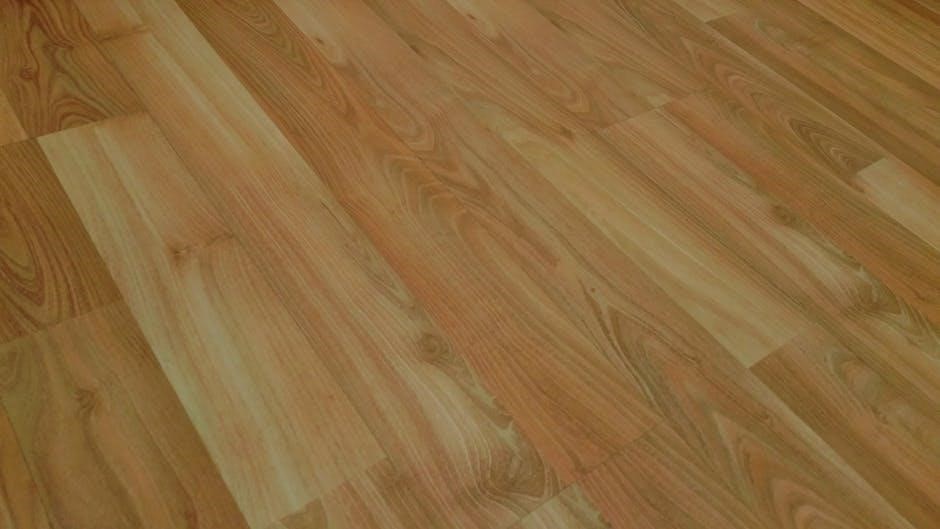
Mohawk laminate flooring offers a durable, stylish solution for homeowners․ Its innovative Uniclic system enables easy, glue-free installation, creating a natural, hardwood-like appearance with minimal effort required․
1․1 Overview of Mohawk Laminate Flooring
Mohawk laminate flooring is a popular choice for homeowners seeking durable, stylish, and affordable flooring solutions․ Known for its realistic hardwood designs and robust construction, it offers exceptional resistance to wear, moisture, and fading․ The flooring features a dense fiberboard core, making it stable and long-lasting․ Mohawk laminate is designed to mimic natural wood, with a wide range of styles, textures, and colors to suit any interior․ Its innovative Uniclic locking system simplifies installation, eliminating the need for glue․ This flooring is ideal for busy households, as it is easy to maintain and withstands heavy foot traffic․ With its combination of aesthetics, durability, and cost-effectiveness, Mohawk laminate flooring is a versatile option for modern homes․
1․2 Importance of Proper Installation
Proper installation of Mohawk laminate flooring is crucial for ensuring its durability, performance, and longevity․ Incorrect installation can lead to issues such as uneven surfaces, gaps, and premature wear․ The Uniclic system, while user-friendly, requires careful handling to avoid damaging the locking mechanism․ Acclimation is essential to prevent warping or buckling due to humidity and temperature changes․ A properly prepared subfloor ensures a stable and even surface, reducing the risk of structural issues․ Following the manufacturer’s guidelines also validates the warranty, providing peace of mind․ Common mistakes, such as improper alignment or insufficient expansion gaps, can compromise the floor’s integrity․ By adhering to installation instructions, homeowners can enjoy a beautiful, functional, and long-lasting Mohawk laminate floor․
Pre-Installation Preparation
Pre-installation preparation involves gathering tools, acclimating flooring, ensuring subfloor readiness, and inspecting planks for damage․ Proper acclimation and subfloor preparation are critical for a successful installation process․
2․1 Tools and Accessories Needed
Installing Mohawk laminate flooring requires specific tools and accessories to ensure a professional finish․ Essential tools include a hammer, saw, pencil, and measuring tape․ Additionally, a tapping block and pull bar are necessary for securing planks․ A utility knife may be needed for cutting underlayment or trimming planks․ Mohawk recommends using their approved underlayment materials to enhance durability and sound reduction․ Accessories like transition strips, stair nosing, and floor trims are also required for a seamless finish․ Proper tools ensure accurate cuts, secure locking, and a polished appearance․ Always refer to Mohawk’s guidelines for a comprehensive list of recommended tools and materials to avoid installation issues․
2․2 Acclimation Process
Acclimation is a critical step before installing Mohawk laminate flooring․ Planks must be allowed to adjust to the room’s humidity and temperature for 24 to 72 hours․ This ensures dimensional stability and prevents warping or gapping after installation․ Place the flooring boxes in the installation room, leaving them sealed to protect from dust․ Maintain a consistent room temperature between 65°F and 75°F and relative humidity between 35% and 55%․ Proper acclimation prevents post-installation issues like misalignment or buckling․ Failure to acclimate may void the warranty․ Always follow Mohawk’s guidelines for acclimation to ensure a successful installation and a secure fit with the Uniclic locking system․
2․3 Subfloor Requirements
The subfloor must be level, clean, and dry to ensure a successful Mohawk laminate flooring installation․ Check for any unevenness, cracks, or moisture issues․ The subfloor should be structurally sound and flat, with no more than 1/8 inch variation over 6 feet․ Old flooring, adhesive, glue, or paint must be removed completely․ Ensure the subfloor is free from dust, oil, or wax, as these can interfere with the installation․ For concrete subfloors, a vapor barrier is recommended to prevent moisture damage․ Proper subfloor preparation is essential for a stable and long-lasting installation․ Failure to meet these requirements may lead to uneven flooring or gapping․ Always follow Mohawk’s guidelines for subfloor preparation to ensure optimal results and warranty validity․
Understanding the Uniclic System
The Uniclic system is a revolutionary, glue-free installation method for laminate flooring․ It features a unique tongue-and-groove design, allowing planks to click together effortlessly for a secure, seamless connection․
3․1 What is the Uniclic System?
The Uniclic System is a revolutionary locking mechanism designed for Mohawk laminate flooring․ It eliminates the need for glue by using an innovative tongue-and-groove design․ This system allows planks to be installed quickly and securely, creating a tight, gap-free connection․ The unique shape of the tongue and groove ensures a strong and durable bond between planks, making the floor both stable and visually appealing․ The Uniclic System is known for its ease of use, enabling both DIY enthusiasts and professionals to achieve professional-looking results․ Its design also allows for flexibility, as planks can be installed in multiple directions, enhancing the overall aesthetic of the floor․ This system is a key feature of Mohawk laminate flooring, contributing to its popularity and ease of installation․
3․2 Benefits of the Uniclic System
The Uniclic System offers numerous benefits, making it a preferred choice for Mohawk laminate flooring installation․ Its glue-free design simplifies the process, saving time and effort․ The innovative locking mechanism ensures a secure, gap-free connection between planks, enhancing durability and stability․ This system is ideal for both professionals and DIY enthusiasts, as it allows for quick and easy installation without specialized tools․ Additionally, the Uniclic System provides a clean, professional finish, eliminating the need for messy adhesives․ Its versatility enables planks to be installed in multiple directions, offering design flexibility․ Furthermore, the system reduces waste and minimizes the risk of installation errors, making it a cost-effective and efficient solution for achieving a high-quality floor․ These benefits make the Uniclic System a standout feature of Mohawk laminate flooring․
Installation Methods and Techniques
Mohawk laminate flooring installation uses the Uniclic system, offering a glue-free, easy-click method․ Planks can be installed in multiple directions, ensuring a flexible and efficient process for any space․
4․1 Uniclic Locking System
The Uniclic Locking System is a revolutionary, glue-free installation method designed for Mohawk laminate flooring․ It features a unique tongue-and-groove design that allows planks to click together effortlessly․ This system simplifies the installation process, eliminating the need for adhesives and ensuring a secure, durable connection between planks․ One of the standout features of Uniclic is its ability to be installed in two different directions, offering flexibility for various layouts․ The system creates a tight, gap-free fit, reducing the risk of misalignments․ Proper alignment and gentle tapping with a hammer are essential for a successful installation․ By following the manufacturer’s instructions, homeowners can achieve a professional-looking finish with minimal effort․ This innovative locking system is a key reason why Mohawk laminate flooring is a popular choice for DIY projects and professional installations alike․
4․2 Different Installation Methods
Mohawk laminate flooring can be installed using various methods to suit different needs and preferences․ The most common method is the floating installation, where planks are laid over an underlayment without being nailed or glued to the subfloor․ This method is ideal for its ease and noise reduction․ Another option is the glue-down method, which involves adhering the planks directly to the subfloor for added stability․ Additionally, some installers prefer the nail-down method, securing planks to the subfloor with nails, though this is less common for laminate flooring․ Each method requires careful preparation and alignment to ensure a seamless and durable finish․ Proper acclimation and subfloor readiness are critical regardless of the chosen installation method․ Always follow manufacturer guidelines for the best results․
4․3 Laying the First Row
Laying the first row of Mohawk laminate flooring is crucial for a successful installation․ Begin by removing the tongue on all long-side joints and the short side of the first plank to ensure proper alignment․ Start the first plank approximately 1/4 inch away from the wall to allow for expansion․ Use a chalk line to mark the wall alignment, ensuring the row is straight․ Secure the first plank firmly, as it sets the foundation for the entire floor․ For a seamless appearance, blend planks from multiple cartons during installation․ Properly aligning and securing the first row guarantees a professional-looking finish and prevents future misalignments․ Always follow the manufacturer’s guidelines for precise results․ This step is essential for achieving a durable and visually appealing floor․
Advanced Installation Topics
Advanced techniques include installing transitions, staircases, and handling complex layouts․ These steps ensure a polished finish and prevent potential damage, enhancing the overall durability and aesthetics of the flooring․
5․1 Installing Transitions
Installing transitions is crucial for a seamless flooring installation․ Use Mohawk’s transition strips to connect laminate flooring to other surfaces like carpet, tile, or hardwood․ Measure the width of the transition and cut it to fit using a saw․ Ensure the subfloor is level and clean before securing the transition with adhesive or screws․ For carpeted areas, attach the transition with a tack strip․ Test the transition by walking on it to ensure stability․ Proper installation prevents tripping hazards and maintains the floor’s appearance․ Follow manufacturer guidelines for specific transition types, such as T-moldings or reducers, to achieve a professional finish․
5․2 Stair Installation

Installing Mohawk laminate flooring on stairs requires precision and patience․ Begin by measuring each step to ensure accurate cuts․ Cut the laminate planks to fit the tread and riser, leaving a 1/4-inch gap for expansion․ Secure the planks using a combination of laminate flooring glue and screws for stability․ For the nosing, attach a stair nosing strip to the front edge of each tread to create a safe and finished look․ Ensure all edges are sealed to prevent moisture damage․ Finally, install stair caps or transitions to blend the flooring with adjacent surfaces․ Proper installation enhances both safety and aesthetics, making your stairs durable and visually appealing․

Troubleshooting Common Issues
Address gaps by checking subfloor unevenness or improper plank alignment․ Misalignments can be fixed by disassembling and reassembling planks․ Moisture damage requires immediate attention to prevent warping․
6․1 Common Installation Mistakes
One of the most frequent errors during Mohawk laminate flooring installation is improper acclimation․ Failing to allow the planks to adjust to the room’s humidity and temperature can lead to warping or gapping after installation․ Another common mistake is not ensuring the subfloor is level and clean, which can cause unevenness and instability in the flooring․ Additionally, neglecting to remove the tongue on the first row or improperly aligning planks can result in poor fit and compromised structural integrity․ Cutting planks without a saw or using incorrect tools can also lead to uneven edges and a less professional finish․ Proper preparation and adherence to instructions are crucial to avoid these pitfalls and ensure a successful installation․
6․2 Solving Gaps and Misalignments
Gaps and misalignments in Mohawk laminate flooring can often be resolved by addressing the root cause․ For small gaps, use a rubber mallet and tapping block to gently tap planks back into place․ If planks are misaligned, disassemble the row and realign, ensuring the Uniclic system clicks securely․ Larger gaps may indicate improper acclimation or uneven subfloors․ Check for planks that were not installed with the correct angle or force, as this can leave spaces․ To prevent future issues, ensure the subfloor is level and clean before installation․ Proper alignment during the initial installation is key to avoiding these problems․ Always refer to the manufacturer’s guidelines for specific solutions to ensure the flooring’s longevity and appearance․
Post-Installation Care and Maintenance
Regularly clean Mohawk laminate flooring with a damp mop and approved cleaners․ Avoid harsh chemicals and excess water․ Use felt pads under furniture to prevent scratches and dents․
7․1 Cleaning and Maintenance Tips
Regular maintenance is essential to preserve the beauty and durability of Mohawk laminate flooring․ Sweep or vacuum daily to remove dirt and debris․ For deeper cleaning, use a damp mop with a Mohawk-approved cleaner, avoiding excessive water․ Never use harsh chemicals, wax, or abrasive materials, as they can damage the finish․ Place felt pads under furniture legs to prevent scratches․ Clean spills immediately to prevent moisture damage․ For stubborn stains, gently scrub with a soft-bristle brush․ Avoid using steam cleaners, as they can harm the laminate surface․ By following these tips, you can maintain your Mohawk laminate flooring’s appearance and ensure long-lasting performance․
7․2 Protecting the Floor from Damage
To protect your Mohawk laminate flooring from damage, take proactive measures․ Use felt pads under furniture legs to prevent scratches and avoid dragging heavy objects․ Place mats at entryways to catch dirt and moisture, which can harm the surface․ High heels and sharp objects can dent the floor, so use caution․ Clean spills immediately to prevent moisture seeping into the planks․ Avoid using harsh chemicals or abrasive cleaners, as they can damage the finish․ For added protection, use Mohawk-recommended cleaning products․ Regularly inspect the floor for wear and tear, addressing issues promptly․ By following these steps, you can safeguard your investment and maintain the floor’s appearance for years to come․
Cost Considerations and DIY vs․ Professional Installation
Mohawk laminate flooring is cost-effective, with DIY installation saving labor costs․ While DIY is feasible, hiring a professional ensures expertise, balancing budget and quality considerations effectively․
8․1 Cost Factors
Mohawk laminate flooring is a cost-effective option for homeowners, offering durability and style at a reasonable price․ The total cost includes materials, underlayment, transitions, and trims․ DIY installation saves labor costs, while hiring a professional adds to the expense․ Factors like room size, material quality, and additional accessories influence the final price․ Tools and accessories, such as a saw and measuring tools, may require an initial investment for DIY projects․ Mohawk provides resources to help estimate costs and plan budgets effectively, ensuring a balance between quality and affordability for various flooring needs․
8․2 DIY vs․ Hiring a Professional
Mohawk laminate flooring installation can be a DIY project or handled by a professional, depending on your comfort level․ DIY installation saves money and is feasible due to the Uniclic system’s simplicity, requiring no glue and minimal tools․ However, complex layouts, staircases, or large areas may demand professional expertise․ Mohawk provides detailed instructions and resources to guide DIYers, ensuring a successful installation․ Professionals, on the other hand, offer a hassle-free experience and warranty coverage․ Assess your skills and time availability to decide the best approach for your flooring project․

Warranty and Manufacturer Recommendations
Mohawk laminate flooring is backed by a comprehensive warranty ensuring durability and performance․ Adhering to manufacturer guidelines is crucial for maintaining warranty validity and ensuring a flawless installation․
9․1 Understanding the Warranty
Mohawk laminate flooring comes with a comprehensive warranty that ensures protection against manufacturing defects and wear․ The warranty typically covers issues like delamination, fading, and stains for a specified period․ Proper installation following Mohawk’s guidelines is essential to maintain warranty validity․ Failure to adhere to recommended practices may result in voiding the warranty․ It’s crucial to review the warranty terms to understand coverage limits and conditions․ Mohawk’s commitment to quality ensures long-lasting performance when installed correctly․ Always refer to the official documentation for detailed warranty information and ensure compliance with all specified requirements․
9․2 Adhering to Manufacturer Guidelines
Adhering to Mohawk’s manufacturer guidelines is crucial for a successful laminate flooring installation․ Proper acclimation, subfloor preparation, and installation techniques ensure the floor performs as intended․ Failure to follow guidelines can void the warranty and lead to premature wear or damage․ Mohawk provides detailed instructions to guide installers, emphasizing the importance of using recommended tools and materials․ Following these steps ensures a secure, even, and long-lasting installation․ Always refer to the official Mohawk installation manual for specific requirements, as deviations may compromise the flooring’s integrity and appearance․ Compliance with guidelines guarantees optimal performance and maintains the validity of the product warranty․

Safety Precautions
Wear protective gear like gloves and safety glasses during installation․ Ensure the area is well-ventilated and free from debris․ Use proper lifting techniques to avoid injury․
10․1 Safety Tips During Installation
Ensure proper ventilation in the installation area to avoid inhaling dust or fumes․ Wear safety glasses and gloves to protect against debris․ Use a dust mask when cutting planks․ Keep power tools at a safe distance from children and pets․ Maintain a clean workspace to prevent tripping hazards․ Avoid overreaching or bending improperly to minimize strain․ Use proper lifting techniques to handle heavy boxes of flooring․ Keep a first aid kit nearby in case of minor injuries․ Follow all manufacturer guidelines for tool usage and material handling․ Regularly inspect tools for damage to ensure safe operation․ By adhering to these safety tips, you can complete the installation securely and efficiently․
10․2 Handling Materials Safely
When handling Mohawk laminate flooring materials, always lift boxes correctly to avoid back strain․ Use gloves to prevent splinters and ensure a firm grip․ Store planks in a dry, flat area to maintain their integrity․ Avoid dragging boxes, as this can damage the flooring․ Use a utility knife or saw with caution, keeping fingers away from blades․ Ensure the workspace is clear of clutter to prevent accidents․ When cutting planks, work in a well-ventilated area to minimize dust inhalation․ Never stack heavy boxes unsafely, as they may topple․ Use a dolly or helper for moving heavy loads․ Proper handling ensures the material remains undamaged and the installation process stays safe and efficient․
Additional Resources and Support
Mohawk provides comprehensive resources, including installation guides, video tutorials, and PDF downloads, to assist with laminate flooring projects․ Find a professional installer through their official website for expert help․
11․1 Mohawk Flooring Resources
Mohawk offers a variety of resources to support your laminate flooring installation․ Their official website provides detailed installation guides, video tutorials, and downloadable PDF manuals․ These resources cover topics such as subfloor preparation, Uniclic system usage, and troubleshooting common issues․ Additionally, Mohawk’s website features a section dedicated to finding professional installers in your area, ensuring a seamless experience․ The resources are designed to be user-friendly, catering to both DIY enthusiasts and professionals․ By utilizing these tools, you can achieve a professional-looking finish and maintain your flooring’s durability․ Mohawk’s commitment to customer support ensures that all installation needs are met with comprehensive and accessible information․
11․2 Online Tutorials and Videos
Mohawk provides an extensive library of online tutorials and videos to guide you through the laminate flooring installation process․ These resources cover everything from preparing the subfloor to completing the final touches․ Step-by-step videos demonstrate how to use the Uniclic system, handle transitions, and install flooring on stairs․ Additionally, troubleshooting tips and expert advice are included to address common challenges․ Whether you’re a DIY enthusiast or a professional, these visual guides offer clear instructions to ensure a successful installation․ The tutorials are accessible on Mohawk’s official website and YouTube channel, making it easy to follow along and achieve a professional-looking result․ These resources are designed to complement the written instructions, providing a comprehensive learning experience for all users․